Saturday, January 31, 2009

it's round up time!

It's the end of January and The Org Junkie is ready to round up those disorganized spaces. This year she is focusing on smaller areas of the home instead of entire rooms.

January's "challenge" (as I like to call it), was the filing cabinet. And, oh baby, was this a good one!

There were two main problems I wanted to get figured out to make this area a little more user friendly and pleasing to the eye (even though no one else sees it on a regular basis since we keep it in our bedroom).

Problem #1:
I'm a label making freak, so my files were already labeled, but the issue was that the two drawers we had were stuffed full of who knows how many years of what, and a whole bunch of other stuff that I wonder if we ever look at.

To make some room, I did some purging of things that I knew I wouldn't need anymore. I also took out all of the household kinds of things (paperwork for appliances, etc.), along with the HUGE folder of tax information all the way back to 2003 and filed them away in a smaller filing box we had already been using for even more stuff (which was also a mess!).

**Added bonus tip** I ended up putting all of the files that hold the receipts for the bills we pay on a monthly basis, since these are the things I file the most. I wanted them all grouped together because I was tired of searching for them since they were all spread out because everything is alphabetical order. Wish I would have done this a long time ago!

BEFORE - filing cabinet (top drawer)

AFTER - filing cabinet (top drawer)

BEFORE - small filing box
I ended up throwing away half of this stuff, thank goodness!
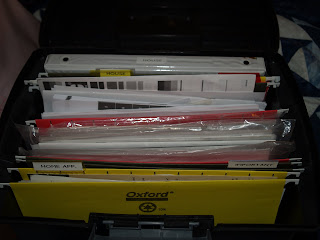
AFTER - small filing box
includes information for our van, tax information from years past
and all household information (indoors and outdoors)


Problem #2:
The biggest problem I have with the filing cabinet area is that I don't have a good system to file papers away in an organized fashion. Therefore, many times it looks like the picture below. Piles of papers, and random things to put away. It stresses me out to see piles, but yet it keeps piling time and time again. I knew I needed some kind of system to help me not have to deal with the filing right away if I was busy, but yet avoid the piles.

BEFORE - filing cabinet area
this isn't even at its worst!

I found this wire filing basket that I had already purchased in our computer armoire in the living room. I hadn't been using it for anything special other than a place to put papers out of the way, but I knew I could make better use of it in this area instead.

I made a couple of files to start with and as I go along, I may find other things that I might need to add. The two files I have are 1) 2008 tax information, so that whenever we receive something we need for filing our taxes, we can just plop it in the folder, and 2) "to be filed" papers, so instead of letting things that need to be filed stack up and be in the way, I'll just slip them in the folder and they're all together for the day I decide to file them in the large cabinet. There is also a space in the wire organizer for magazines.

The small black organizer is for my husband to put all of his receipts and various notes he finds in his pocket, car, etc. That way they're not just floating around everywhere and he knows (and I know) right where to get them if we need them.

And, of course, nothing feels complete without a picture to spruce up the space. This is my husband and I snorkeling in Hawaii on our honeymoon.

Nothing like seeing a clean, organized space and dreaming of vacation, right?

AFTER - filing cabinet area
Although these were small changes, they were necessary changes and I look forward to being able to keep a clean area not only here, but also on the dresser next to the cabinet. Oftentimes all the stuff would spill onto the dresser, and it was not pretty. It's been almost a week since I've finished this project (I did it in two phases), and there is yet to be clutter in sight. That's a success if you ask me!

For more filing cabinet transformations, visit The Organizing Junkie's January Round Up.


Friday, January 30, 2009

something was missing

I usually don't decorate much for Valentine's Day, but this year I had the itch to do a few things that might bring some different color into my decor, even if it's just for a short while. I like pink and red...just not too much pink. We have red couches, so many of my candles and a few wall decor pieces have some splashes of red already. I plan on showing you some of the little touches I've made, but first I want to show you my little transformation that I am quite proud of. Because, you see, I don't usually have "the eye" for being able to transform things like some awesome crafty bloggers I have read (yes, Carrie from Buzzings of a Queen Bee, I'm talking about you!), but I thought I would give it a go!

I found this cute little wreath at Marshalls during their after Christmas clearance sale at the end of December. It was marked down to $10 and then I got another 50% off of that, so I picked this little baby up for $5. I was originally going to use it for all-year decor, but I couldn't quite figure out what was missing, or quite find the perfect spot for it in my home.


At the beginning of the week, I took it to Michaels Crafts with me to see if I could find some ribbon that I could add to it, but then this caught my eye, and for only $2.99, I snagged it. It looked a little shabby on its own (and sorry for the darker picture), so I began to wonder what I could do with both of these finds if I put them together.


After I got home (maybe a few days later), I took out my thin-gauged wire, wire cutters, and hot glue gun, and went to work like MacGyver.

And this is what I came up with....


Nothing too fancy, but I think it turned out pretty cute. I like simple. And I like cute. This Valentine's wreath will now welcome our guests during the month of February. And one of the best parts about it was that it only cost $8 to make, and I had some fun in the process. Any chance I get to use some creativity, I'm all over it!

Thursday, January 29, 2009

i {heart} target

Yes, that's right...I'm in love with Target. Target clearance to be exact. I have found some amazing deals these last few weeks while making some frequent visits to Target (it's literally 3 minutes away). From toys to clothes to shoes to kitchenware, and whatever else you can think of! I'm talking 50-75% off, people! Like I said. Amazing.

Mikayla has been sleeping in a big girl bed since January 1st of this year and since then I've been waiting for the right comforter to jump out at me. I really wanted it to be something to match the purple colors of her room, which are a little hard to find since they aren't the typical lavendar colors. I figured something would come around one of these days and in the meantime, I would be content with just having sheets and blankets to cover her.

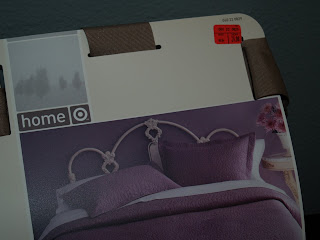
Well, "one of these days" happened! That moment where it was just meant to be. I was in Target yesterday, and I had been browsing and taking my time digging through all of the clearance stuff in various places in the store (I was without kids, by the way) and as I was walking down one of the main aisles, I looked over and saw this beautiful purple quilt, and I said to myself. That looks just like the color of paint in Mikayla's room. And, then I saw the red sticker (we all know what that means!), and then I saw what the red sticker said.

What? Can't quite see the price?


Well, how about this?


Yes, you are reading this right. It took me a few blinks to find out if I was seeing it right. It was 50% off!! I got this beautiful twin quilt for only $25. I could not have found anything that I would have liked better, and then I got a steal of a price on top of it. Unbelievable! Can you tell I am so giddy about this find? It honestly just blows me away, it was that exciting. To make it even better, the twin size was the only one on clearance. The queen/full and king were regular size. What are the odds?? I really wanted to buy a matching pillow sham, but it was $15 regular price and I just couldn't do it.

I'm a big fan of simple, and then I try to spruce it up with other things, so I'm going to see if I can have my mom make some small accent pillows. Last summer, I bought some brand new pillow forms for $.50 each at a garage sale. Now, I just need to head to the fabric store to find some perfect fabric.


The only thing that could have been better about this deal is if it was 75% off.

OK, now I'm pushing my luck.

To take a peek at what others are loving today, head on over to The Diaper Diaries.

Wednesday, January 28, 2009

frosty the snowman still lives!

On Tuesday we woke up to it snowing outside. I guess it's still considered winter, so it really shouldn't be too much of a surprise if it snows. But, hello? It's Oregon! I kind of embraced it this time and was ready to get snowed in again (Leanna, you're probably laughing at me right now over there in Maine!), but as Oregon snow often does, it was melted by noon. I tried to capture how HUGE the flakes were, but the picture doesn't quite do it justice. In "real life", it literally looked like cotton balls were slowly falling from the sky. (And, no, that's not my house...I wish! It is for sale, though. Hmmm....)


Since it had just snowed, I thought it would be the perfect opportunity to pull out the recipe for the snowman treat I was wanting to make with Mikayla. I had just read about this idea on Sunday night in the February issue of Family Fun magazine, and had actually wished it would snow a little bit, so I could do it...not that it actually needed to snow. So, in honor of some January snowfall, we created some snowmen friends.

As I was preparing the ingredients so that we could assemble the snowmen, I thought to myself...what could we put all of these in? A muffin tin! Perfect! And, since I hadn't done a muffin tin for this week, I figured this would be a fun one to share. (Head on over to Her Cup Overfloweth for other Muffin Tin Monday participants.)

Ingredients needed (clockwise): pretzel sticks, thick-sliced bananas, apple triangles, mini chocolate chips, and blueberries (the recipe used grapes, but we didn't have any, so I improvised!), not pictured: a sliver of a carrot for the nose & wooden skewers
See how proud Mikayla is of her little creation...
she kept calling him Frosty the Snowman

Our masterpieces served on a platter
These were so much fun to make! Mikayla loved helping (and, of course, stealing bites of the chocolate chips). I think creating things out of food kind of puts more fun into actually eating it!

For more fun and tasty snack recipes, visit Snack Time! at the Family Fun website.

keep the love alive

On Sunday I was working on The Org Junkie's monthly roundup by cleaning up my filing cabinet (come on back in a few days to see my before and after!) and I came across a file labeled "from Heidi". I started to look through it and found all of the cards, notes, and misc. things that I have given my husband over the six years since we've been together. I was able to do a little reminiscing as I pored over all of the creative ways I used to show him how much I love him! It's then that I noticed that the longer we have been together, the less things I have done for him. Can we say kids, anyone?

So, for Works for Me Wednesday, and with Valentine's Day approaching, I thought it would be fun to share some of the creative things I have done for my man in the past...on birthdays, anniversaries, and Valentines day. I won't share with you the stacks of cards (and surprisingly it was a lot!) or the handwritten notes (yes, he has kept them all...how sweet!), but here are a few fun things...

For Ryan's birthday a little over three years ago, I made him a special coupon book with fun things we could do together (and that HE really enjoys doing), like going to a movie of his choosing, playing tennis, picking berries, and going fishing.


For an anniversary gift (or maybe a birthday?), I created a scavenger hunt (with rhyming poems even!) taking him various places that we enjoy. We did fun things like go to Outback Steakhouse, a movie, and on the way home we picked up some icecream. To finish it up, I had gotten him a surround sound system.


For our first Valentine's Day together, I made a little goodie bag that had a few random things inside and to each of those things, a little note was attached. Some of the goodies included: a baggie of conversation hearts that all said "Mad 4 U", breath mints, lottery ticket, a candle, and a 100 Grand candy bar. It was kind of cheesy, but I think he loved it!


Almost five years ago, I surprised Ryan with a barbecue party and a new barbecue for his birthday! I sent out invites and right before the party was about to start, I showed Ryan his new barbecue out on the patio. He had only thought that his family was coming over, and was shocked to find that his friends were coming too!


Finding these things has really inspired me to use my creativity to do more things for my husband. I really enjoy making him smile, so hopefully I can do a little more of that! Sometimes it's easy to get overwhelmed with all the things that require of us as moms, but I can't forget that I'm also a wife.

Keeping the creativity and the fun in my marriage works for me!

For other Works for Me Wednesday tips, check out Rocks in My Dryer.

Tuesday, January 27, 2009

a minivan makeover & delicious desserts

For this week's Tuesday Tackle, it's a two-part tackle.

One part "have-to" and another part "want-to".

Part One:
Although a bit chilly, the weather was beautiful on Monday, so I ventured out to finally do something that I have been putting off time and time again...clean the car!! I was tired of seeing cracker crumbs, goldfish, cheerios, and so much more on the floor, in the carseat, and everywhere I looked! Not only did I get that Shop-Vac to do its work, but I also wiped down the interior a bit. It took about an hour, but I feel like I have a new car again! Next step: washing the outside. That's going to have to wait...

BEFORE
(this picture doesn't show the true filth!)

AFTER
Part Two:
Last Tuesday, I tackled typing up my recipes and organizing my recipe box. After doing that, I realized it was getting quite full...too full, in fact, that I needed to do something about it so I could add more recipes in the future. I decided I would take all of my dessert recipes and make my own little recipe book just for desserts.

I started out with picking up a small little photo album (they're only $1 at Target!), and pulling out all of my dessert recipes.


I quickly realized that all of my dessert recipes were not going to fit into the small book that I had bought. I decided to put all of the recipes in three piles to sort through: 1) I will never make, so get rid of 2) maybe I will keep, and 3) definitely keep! I went back and forth and was able to narrow it down to the recipes that I truly wanted and knew I would actually make!


Of course, I had to make my own little cover...


Now, I have all of the dessert recipes right at my fingertips.


I wasn't the only one who was doing some tackling today.

These two little blue-eyed blessings love to play and tackle each other.

True sister-brother tackling.


For more Tuesday Tacklers, head on over to 5 Minutes for Mom.

Get inspired!!

Monday, January 26, 2009

get to know me and my menu

** For Menu Plan Monday, see below, but feel free to take a minute and get to know me...

Every now and then I come across a blog that I can easily get sucked into because of the fun personality I can pick up from the things they share. A few weeks ago, I stumbled upon Kasey's blog, All That is Good, and have enjoyed coming back to visit time and time again. She is a mother of two (like me!) and someone who undoubtedly loves God and her family (like me!). She has started a weekly blogging activity on Mondays where you share just a little bit about yourself, so that other bloggers can get to know you. This week's activity is to share 10 random things about yourself. I have to admit this was rather hard for me, but here they are in no particular order.

10 Random Things You May Not Know
(or even want to know)
About Me


1. The kitchen has to be clean before I can go to bed.
2. I've never had a cup of coffee before...not even a mocha or latte.
3. Once, I rewrote all the entries in my checkbook register because it looked too messy.
4. I don't like breaking the rules. At all.
5. I slept with my baby blanket until my daughter took it away for herself, about 2 years ago.
6. I will never eat peanut M & M's again because of a bad run-in with the toilet.
7. I have to have a fan on to sleep at night.
8. I label almost everything. You name it. It's labeled.
9. I've never left the country, and probably never will. I'm a wimp, and live vicariously through others who travel.
10. I only use one color/kind of pen on my calendar, and only I'm allowed to write on it.


* * * * * * * * * * * * * * * * * * * * * *

And, in other random news...

I was finally able to get my menu planning system up and ready to use. I bought this weekly dry erase board from Target back when school supplies were still heavily on the shelves...was that really 4 or 5 months ago?

I had originally planned on using it on the back of our pantry door, but only after a short few hours, it fell down. So, I set it aside because of frustration and forgot that I had even bought it. On Sunday, during my cleaning up frenzy, I found it and my husband engineered a new way to hang it. So now it sits sturdy on the wall. I decided to put it around the corner in my kitchen where I keep my calendar. Out of sight for most, but not for me. I added the ribbon to the eraser so I could hang it, and I love that it comes with a couple of magnets, so I can place the recipes on it for quick reference.


If I continue to get my menu planning act together I hope to be able to add not only the main dish, but the side dishes, too, but I can't go too crazy all at once, can I?

Sidenote: After organizing my recipe box last week, I decided to try a new recipe that I got on a website (non-reviewed). It was a complete flop...absolutely disgusting and from that moment have decided that I will not attempt a new recipe unless a) I've had it before and I ask for the recipe, b) A trusted friend gives me the recipe because they've made it before, or c) The recipe has been given good reviews by many (such as AllRecipes). Plain and simple. Easy as that. I've learned my lesson...unfortunately the hard way. Yuck! I think I still have the taste in my mouth.

And, here's what you've been waiting for...

My Menu For the Week

Monday - a variation of this Barbecue Chicken Salad
Tuesday - Baked Potato Bar with homemade chili
Wednesday - Chicken & Cheese Stuffed Shells
Thursday - Slow Cooker Beef Enchiladas
Friday - friends in town - out to dinner!
Saturday - Family Pizza Night
Sunday - Superbowl Goodies!!


Head on over to The Organizing Junkie and see what others are cooking up for Menu Plan Monday!

Sunday, January 25, 2009

who stole the cookie from the cookie jar?


I'm trying not to keep too many sweets around these days, but it seems like the cookie jar that I have on the counter always looks a little odd with nothing in it.

I thought it might be fun to fill it up with something different, so I put some Satsumas in it and the jar came alive! Now, instead of reaching for a cookie, I can have a healthier snack instead.

When the oranges are gone, what else do you think I could put in the jar instead of cookies?

Saturday, January 24, 2009

don't let your daddy see you with those...

Austin has found quite the love for his sister's purses...

Shh...don't tell Daddy.

Friday, January 23, 2009

shoe heaven

On Monday, I stopped by Target (my third trip in a week!) and I hadn't been through the shoe aisle yet, so I decided to browse, especially since I didn't have the kids with me.

Boy, did I hit the shoe jackpot!! I found 5 pairs of shoes for all under $5 (most of them were only $3.50).

Of course, as always, Austin was outnumbered and only came away with one pair, which will be saved for future use. Mikayla will be able to wear a couple of shoes by this spring and a couple will probably fit her into the summer.

It's amazing how a good deal can make me so giddy! And, thanks to my friend, Kim, spreading the news about the big sale going on at the Carter's Outlet in Woodburn on Monday, I came away with even more amazing deals.

Now, if I can only get my husband to understand just how amazing these deals are!

And, speaking of deals...

Thanks to a new blog I found called Frugal Fulfillment, I found out that the Children's Place online store is having a Monster Sale! They have low inventory on quite a few of the things advertised, but I was able to find a few things that will definitely work for the kids. The shipping is a $5 flat fee, so it's not too bad. Go check it out...just don't expect me to tell you how to explain it to your husband.

Thursday, January 22, 2009

cheers!


I just can't get enough of these sweet babes of mine...

Cheers to the good life!


{Photo taken by Annie Schilperoort}

The first couple of times it's Mikayla talking in the background,
but listen carefully and you'll hear Austin near the end.


Tuesday, January 20, 2009

making it extra girly

Updated to add on 5/5/09: I'm so excited to share that this post was featured on Tip Junkie in her Spring Cleaning & Organizing posts!!

Welcome to all those coming over from Tip Junkie! So glad that you stopped by. You might want to check out my obsession with baskets if you're looking for some more organizing tips. I have also shared my top 5 ways to organize toys! Or if you're in the mood to stay awhile, you can browse all of my organizing posts! And, because I can't quite keep everything the same for too long, I have already done a little makeover project with the hair accessories container.

************************************

Over the weekend, I had a few extra minutes during the kids' naps, and so I decided to work on a couple of little projects I had been hoping to get to for quite some time.

I've been needing something other than a basket I was already using that would help organize all of the many hair accessories that are starting to accumulate, especially with my daughter's hair getting so long. Nowadays her hair most often has to be (should be) done...at least the knots brushed out.

Here's my little cutie with some bed head going on...see what I mean? It can get a little crazy!


My first project was to find a little container that could hold her curly ribbon barettes, rubberbands and some of the other larger barettes. I found this in my scrapbooking stuff, added a few alphabet stickers to spell "hair stuff" just for fun, and called it good. The see through container shows off the curly ribbon, which added a cool look, so I didn't feel like it needed any embellishments.


My second project I had been planning to do for awhile, and since my sister made Mikayla some adorable bows (sure, Kim, I'll take more!) over Christmas break, I knew I needed to get this done sooner than later.

I made the bow holder by using a wide ribbon and looping it through a key chain ring so I could hang it. I had found a cute, pre-painted wooden butterfly at JoAnn's Crafts sometime at the end of last summer, and it added the perfect touch to the top of the ribbon. Just what it needed to look complete.


My last project was the one that took the longest. I have quite a few of these little babies (empty, of course) sitting around in my garage just waiting to be used for some craftiness...


I pulled one out, got a little crazy with some Modge Podge, paper, and ribbon, added another pre-painted wooden cutout like mentioned before, and it transformed into a cute little container that can hold the much needed detangler spray, water spray bottle, brush, and comb.


These little projects have now joined Mikayla's room decor and they fit in quite nicely with the purple. I love that I can find things easily without digging through a basket.


Organized hair accessories for an almost 3-year old works for me, especially because it's fun then to do her hair like this...


Head on over to Rocks in My Dryer for more Works for Me tips.

plenty full of recipes!

For this week's Tackle it Tuesday, I finally accomplished something I had been putting off, and chipping away at a little bit over time.

I love finding a new recipe and most of them I find off the internet on recipe sites or through blogs and various other sites. When I find a recipe I like, I usually copy and paste it into a Word document on the computer to use for later (most likely I forget about it) or if I want to use it that day, I print it off and when I'm done with it, tuck it away in a folder for later. I like to make notes on my recipes, so many times it looks like chicken scratch.

Here's the folder of hodge podge recipes (although this is after I had already typed up at least 20 recipes)...


...transformed into 4x6 note cards in a recipe box...


I already had many of my recipes printed off on 4x6 note cards (something I started at least 4 years ago) thanks to the help of my husband who created a template where I could easily and efficiently type up the recipe and it would format it for me in the correct form. Then all I had to do was print them off on index cards.


So, I'm officially up-to-date with my box of recipes, and they are not only organized by categories on the computer, but also in the recipe box. Now, I can easily find "that-one-recipe-I-wanted-to-fix-and-was-sure-it-was-right-here". It feels so good to know that I've tackled this project and I plan to keep it up.

However, after printing off these recipes, I realize how full my recipe box is getting, so I have a plan brewing for a special way to organize my dessert recipes. You'll have to come back to see!

* * * * * * * * * * * * * * * * * * * * * * * * * * * * * * *

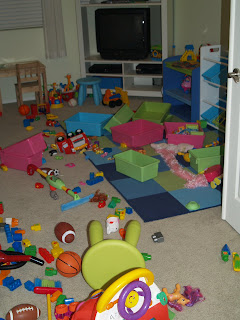
Although, I suppose I should have been tackling the play room instead...

So much for my organized efforts I shared last week.

I guess every day can't be organizationally perfect!

 
blog template by yummylolly.com